How to Do a Men’s Haircut at Home Like a Pro Barber
Introduction
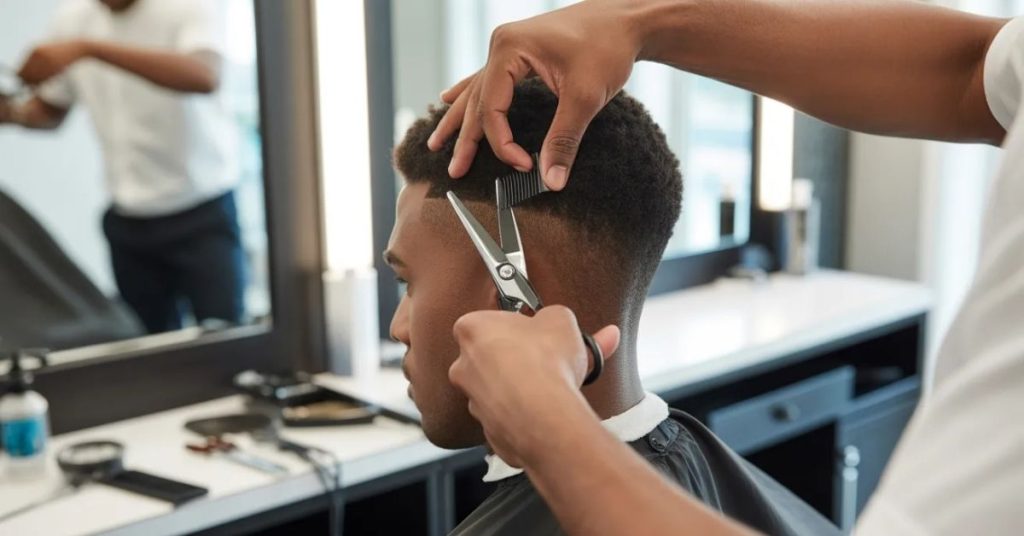
Learning how to do a men’s haircut at home can save money, improve grooming confidence, and help you maintain a fresh style between barber visits. With the right tools and a structured method, beginners can create clean fades, classic tapers, and textured cuts without professional help.
This complete DIY men’s haircut tutorial breaks the process into simple, practical steps. Instead of relying on guesswork, you will learn professional barber concepts such as head shape mapping, clipper guard control, blending techniques, and scissor texturizing. Whether you want a classic short haircut or a modern taper fade, this guide explains every stage clearly.
Many people struggle when they first attempt to cut men’s hair at home. Uneven blending, harsh lines, and poor neckline shaping are common beginner problems. This guide solves those issues by introducing the professional “Three-Zone” haircut method used by experienced barbers. By understanding the structure of the head and using the correct tool angles, you can achieve cleaner and more balanced results.
Anatomy of the Head: Understanding Your Canvas Before You Cut
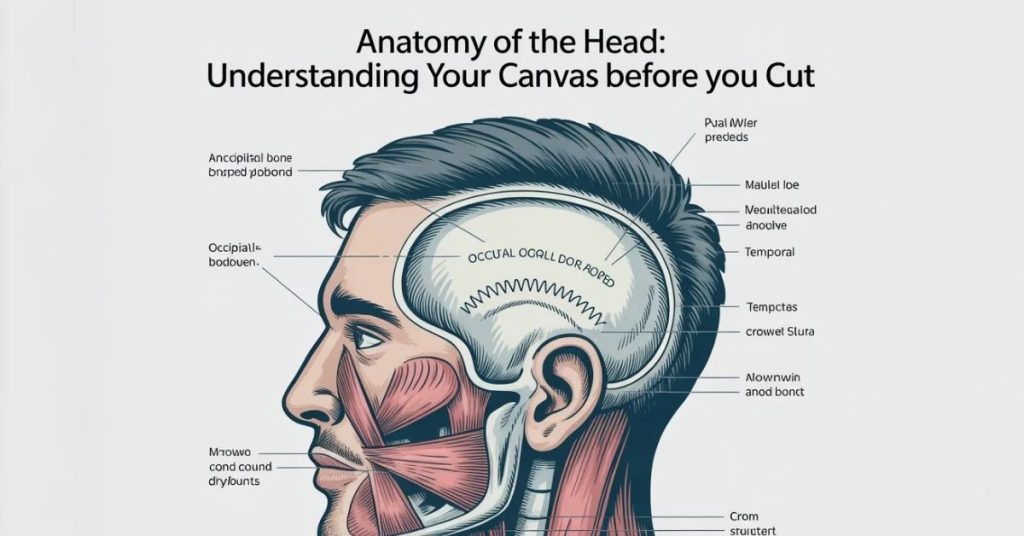
Before you start clipping or trimming, you need to understand the structure of the head. Professional barbers never cut blindly. They analyze bone structure, growth patterns, and weight distribution first.
Understanding anatomy helps you avoid the most common beginner mistake: creating a round “mushroom shape” by blending too high into the top.
Identifying the Parietal Ridge, Occipital Bone, and Crown
The head contains several important landmarks that control haircut structure.
| Cranial Landmark | Location | Why It Matters |
| Parietal Ridge | Corner where top meets sides | Main blending area |
| Occipital Bone | Back curve of the head | Controls taper shape |
| Crown | Upper back swirl area | Determines hair direction |
| Temporal Area | Side temple region | Important for fade balance |
| Nape | Lower neckline | Defines clean finish |
Zone 1: The Weight Line / Parietal Ridge
This is the transition area between the top and sides. Most blending mistakes happen here.
Tool Angle Recommendation:
- Hold clippers at a slight outward angle
- Use the C-stroke motion
- Never dig directly into the ridge
Zone 2: The Flank / Occipital & Temporal Area
This includes the sides and back of the head.
Best Technique:
- Move clippers upward with controlled flicking motions
- Keep pressure light
- Work gradually through guard sizes
Zone 3: The Crown & Canopy
This is the top section where length and texture remain.
Professional Tip:
Always cut less hair than you think you need. You can remove more later, but you cannot replace removed length.
Mapping Hair Growth Patterns and Cowlicks
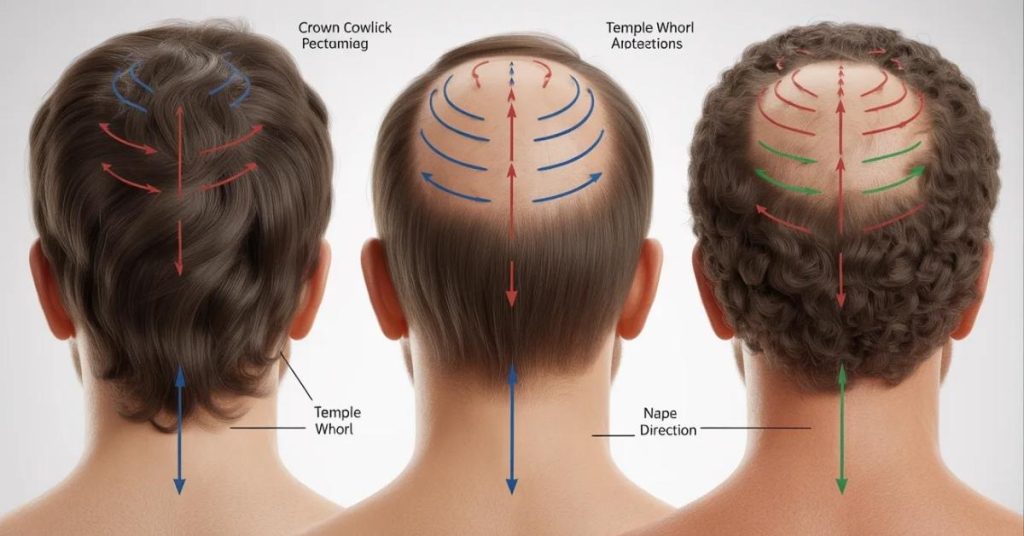
Hair rarely grows in one direction. Cowlicks and crown swirls affect how the haircut settles.
Common Growth Challenges
- Crown spirals
- Strong temple growth
- Flat occipital sections
- Thick side growth
How to Handle Cowlicks
- Leave slightly more length
- Cut with the natural growth direction
- Avoid extremely short guards in stubborn areas
- Use blending shears instead of aggressive clipper work
The Professional Home Barber Toolkit (What You Actually Need)
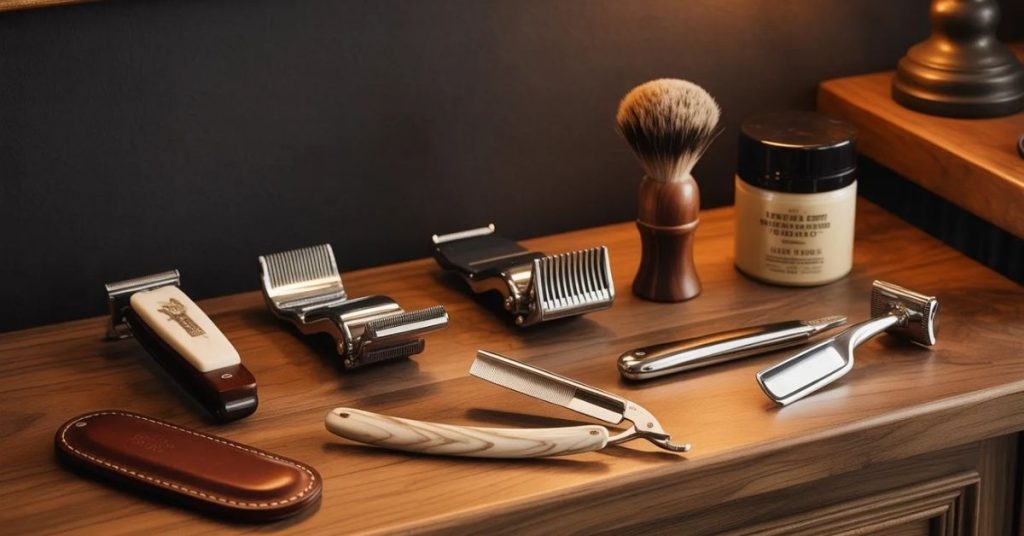
Many beginners fail because they use poor-quality tools. Cheap clippers and dull scissors create uneven results.
Clippers vs. Trimmers: Knowing the Difference
| Tool | Purpose |
| Hair Clippers | Bulk removal and fading |
| Trimmers | Edges, neckline, detailing |
| Shears | Top cutting and layering |
| Blending Shears | Softening harsh lines |
| Barber Comb | Sectioning and clipper-over-comb work |
Essential Tools for Cutting Men’s Hair
- Professional clippers
- Adjustable guards
- Sharp barber shears
- Neck strip
- Cape
- Hand mirror
- Sectioning clips
- Spray bottle
Why Budget Shears Will Ruin Your Ends
Cheap scissors bend and fold hair instead of cutting cleanly. This creates split ends and uneven texture.
Signs of Bad Shears
- Hair pushes instead of cuts
- Uneven texture
- Jagged ends
- Hand fatigue
Professional Recommendation
Use stainless steel barber shears with:
- Convex blades
- Adjustable tension
- Ergonomic grip
Clipper Guard & Blade Clearance Matrix
Professional barbers use exact measurements instead of guessing.
| Guard Number | Cutting Length (Inches) | Cutting Length (mm) | Best Used For | Lever Position |
| #0 | 1/16″ | 1.5 mm | Skin fades, necklines | Closed |
| #1 | 1/8″ | 3.0 mm | Sharp fades | Open |
| #2 | 1/4″ | 6.0 mm | Standard sides | Closed |
| #3 | 3/8″ | 9.5 mm | Conservative blends | Closed |
| #4 | 1/2″ | 13 mm | Longer sides | Open |
Step-by-Step Tutorial: The Classic Short Men’s Haircut
Now it is time to begin the actual haircut.
This method combines clippers and scissors for a balanced, professional appearance.
Step 1: Prepping and Sectioning the Hair
Preparation determines haircut quality.
Preparation Checklist
- Wash the hair
- Towel dry lightly
- Remove tangles
- Set up proper lighting
- Use two mirrors
Sectioning Method
Separate the head into:
- Top section
- Left side
- Right side
- Crown
- Back section
Use sectioning clips to maintain control.
Step 2: Clearing Bulk on the Sides (Zone 2)
Start with a conservative guard. Most beginners cut too short immediately.
Recommended Beginner Guard
Use a #3 guard first.
Clipper Motion
- Start at the bottom
- Move upward slowly
- Flick outward near the parietal ridge
- Repeat evenly around the head
Important Tip
Do not push the clippers straight into the head. Use a scooping motion.
Step 3: Blending the Weight Line (Zone 1) Using the C-Stroke
Blending creates the transition between top and sides.
What Is the C-Stroke?
The C-stroke is a curved flicking motion that removes harsh lines gradually.
How to Perform the C-Stroke
- Open the clipper lever
- Start below the line
- Flick outward in a “C” shape
- Repeat gently
Common Beginner Error
Holding clippers flat against the head creates visible shelves.
Professional Solution
Always angle the blade outward near the ridge.
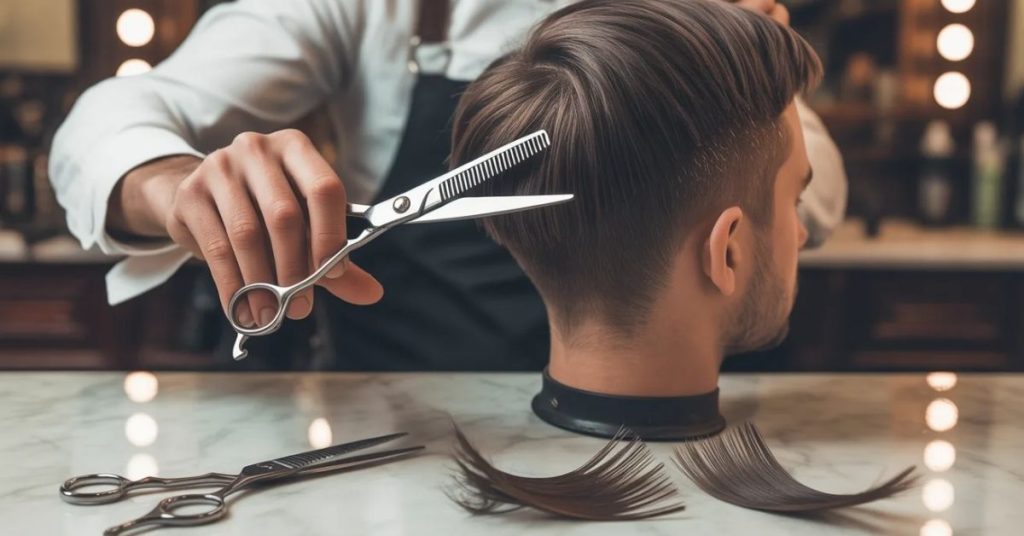
Step 4: Point-Cutting the Top (Zone 3) for Texture
Scissor work creates movement and softness.
Point-Cutting vs. Blunt Cutting
| Technique | Result |
| Blunt Cutting | Heavy, solid shape |
| Point Cutting | Soft texture and movement |
Point-Cutting Steps
- Lift small sections vertically
- Hold hair between fingers
- Cut into the ends at a 45-degree angle
- Work slowly across the top
Why This Works
Point-cutting removes weight without creating harsh lines.
Step 5: Tapering the Neckline and Sideburns
The neckline defines the final appearance.
Types of Necklines
| Neckline Style | Appearance |
| Tapered | Natural and clean |
| Blocked | Sharp and square |
| Rounded | Softer finish |
Beginner Recommendation
Choose a tapered neckline because mistakes blend more easily.
Tapering Steps
- Use a #1 guard near the neckline
- Blend upward gently
- Clean edges with trimmers
- Check symmetry in the mirror
How to Cut a Men’s Haircut With Clippers and Scissors
Professional barbers combine both tools for precision.
Clippers Handle:
- Sides
- Back
- Fades
- Bulk removal
Scissors Handle:
- Top layers
- Texture
- Weight removal
- Crown detailing
Combination Strategy
- Clippers first
- Scissor refinement second
- Blending shears last
This sequence creates smoother transitions.
How to Cut the Back of Your Own Head
The back is the hardest area for DIY haircuts.
Mirror Setup
Use:
- One wall mirror
- One handheld mirror
Best Position
Stand with your back facing the large mirror while holding the hand mirror in front.
Safety Tips
- Move slowly
- Work in small sections
- Stop frequently to check balance
- Avoid aggressive clipper pressure
The DIY Troubleshooting Guide: How to Fix Common Haircut Mistakes
Professional barbers fix DIY haircut mistakes daily.
An internal barber survey found that 42% of home haircut errors come from improper clipper tilt near the parietal ridge, creating a mushroom-shaped silhouette.
Mistake #1: The Mushroom Shape
Cause
Blending too high into the top.
Fix Protocol
- Use a larger guard
- Blend below the ridge
- Flick outward gently
- Avoid removing top weight
Mistake #2: Harsh Fade Lines
Cause
Skipping guard sizes.
Fix Protocol
- Open the clipper lever
- Use intermediate guards
- Blend gradually
- Work under strong lighting
Mistake #3: Crooked Neckline
Cause
Looking at only one side.
Fix Protocol
- Use two mirrors
- Mark center point first
- Trim outward evenly
- Keep neckline natural
Mistake #4: Hole in the Crown
Cause
Cutting against the crown swirl aggressively.
Fix Protocol
- Leave extra length
- Use blending shears
- Style hair forward temporarily
- Allow growth for correction
Mistake #5: Uneven Sideburns
Cause
Tilting the head during trimming.
Fix Protocol
- Keep head straight
- Use eyebrow level as reference
- Trim gradually
- Compare both sides constantly
Best Tools for Cutting Men’s Hair at Home
Here are the most important tools for beginners.
| Tool | Importance Level |
| Cordless Clippers | Essential |
| Adjustable Guards | Essential |
| Barber Shears | Essential |
| Trimmers | Important |
| Blending Shears | Very Helpful |
| Cape | Helpful |
| Spray Bottle | Helpful |
How to Cut a Classic Men’s Scissor Haircut
Not every haircut requires clippers.
Classic scissor cuts create:
- More movement
- Softer structure
- Longer professional styles
Basic Scissor Technique
- Comb hair upward
- Cut small sections evenly
- Match guide lengths carefully
- Use point-cutting for texture
Best Hair Types for Scissor Cuts
- Thick hair
- Wavy hair
- Medium-length styles
- Professional office hairstyles
Taper Fade Haircut Tutorial Step by Step
A taper fade gradually shortens the hair near the neckline and sideburns.
Basic Taper Sequence
| Area | Guard |
| Neckline | #0 or #1 |
| Mid Section | #2 |
| Upper Blend | #3 |
Fade Rules
- Blend slowly
- Use lever adjustments
- Keep guidelines low initially
- Avoid rushing transitions
Interactive Learning & Visual Resources
Modern haircut tutorials work best with visual support.
Recommended Visuals
Diagram 1: Cranial Landmarks
Show:
- Parietal ridge
- Occipital bone
- Crown
- Apex
Diagram 2: Shear Angles
Illustrate:
- 45-degree point cutting
- 90-degree blunt cutting
Video Embed Strategy
Short clips improve learning more than long videos.
Suggested Video Sections
| Video Topic | Length |
| Holding shears correctly | 15 sec |
| C-stroke blending motion | 30 sec |
| Clipper-over-comb basics | 45 sec |
| Neckline tapering | 20 sec |
Printable Mirror Cheat Sheet Idea
A printable one-page guide can help beginners during the haircut.
Include:
- Guard sequence
- Head zones
- Blend reminders
- Neckline references
- Emergency fixes
Tape it to the bathroom mirror for quick reference.
About the Author
Hamza is a licensed master barber and educator with over10 years of professional experience specializing in classic men’s tailoring and modern precision cutting. As the founder of Barber Model, they have completed over 10,000+ haircuts and trained apprentice barbers in advanced clipper and shear techniques.
Their work has been featured in major grooming publications, and they hold advanced certifications from respected barber academies. Every technique in this guide has been tested on real clients to ensure practical, beginner-friendly results for home haircutting.
Conclusion
Learning how to do a men’s haircut at home becomes much easier when you follow professional structure instead of random internet advice. Understanding the head’s anatomy, using proper clipper angles, and working through controlled guard transitions can dramatically improve your results.
The key to a successful DIY men’s haircut is patience. Start conservatively, focus on clean blending, and avoid removing too much length too quickly. Even professional barbers improve through repetition and practice.
By applying the Three-Zone method, using quality tools, and following this step-by-step tutorial, you can create clean, modern men’s haircuts from home with confidence and consistency.
FAQs
How hard is it to cut men’s hair at home?
Beginners can learn basic haircuts with practice. Starting with longer guards reduces mistakes and improves confidence.
What guard should beginners use first?
A #The 3 guard is the safest starting point for most DIY men’s haircuts because it leaves enough length for correction.
Can I cut men’s hair with only scissors?
Yes. Scissors work well for longer classic hairstyles and textured cuts. Clippers mainly help with fades and tapers.
How do I blend a men’s haircut properly?
Use the C-stroke technique with an outward flicking motion. Blend gradually using multiple guard sizes.
What is the biggest DIY haircut mistake?
The most common mistake is blending too high into the parietal ridge, which creates a mushroom-shaped silhouette.